Ready to upgrade your home’s heating? Installing a new radiator can be a rewarding DIY project that boosts both comfort and efficiency. Our step-by-step guide walks you through the process of installing a radiator safely, ensuring a warm, cosy room for years to come.
There’s a unique satisfaction that comes from improving your home with your own two hands. It’s the feeling of looking at a finished project, knowing you’ve added value, comfort, and style. Replacing an old, inefficient radiator with a sleek new model is one of those gratifying tasks. But let’s be honest, the thought of tackling plumbing can be daunting. Visions of leaks and water damage are enough to make any budding DIYer pause.
Fear not! With careful planning, the right tools, and a methodical approach, learning how to install a radiator is a manageable and achievable goal. This comprehensive guide is designed to walk you through the entire process, from initial preparation to the final check, ensuring your installation is not only successful but also safe and efficient.
Before You Begin: Planning and Preparation
A successful installation is 90% preparation. Rushing this stage is the most common cause of mistakes. Before you even think about picking up a wrench, you need to lay the groundwork.
Essential Tools and Materials
Gathering everything you need beforehand will make the job run smoothly. You don’t want to be halfway through, covered in water, only to realise you’re missing a crucial component.
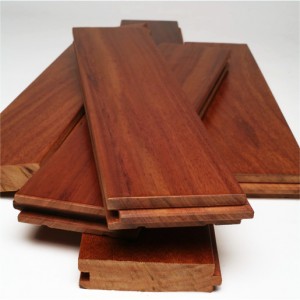
- New Radiator: Ensure it’s the correct size and type for your room’s heat requirements.
- Radiator Valves: Two new thermostatic or manual valves.
- Adjustable Spanner & Pipe Wrenches: For tightening and loosening fittings.
- Radiator Key: For bleeding air from the system.
- Spirit Level: To ensure your radiator is hung perfectly straight.
- Pipe Cutter: For a clean, square cut on your pipes.
- PTFE Tape: For sealing thread connections.
- Wall Plugs and Screws: Heavy-duty ones suitable for your wall type (e.g., solid brick, plasterboard).
- A Hosepipe and Buckets: For draining and containing water.
- Towel or Rag: For inevitable spills.
Choosing the Perfect Location
While you might be replacing like-for-like, it’s worth considering if the current location is optimal. The best place for a radiator is typically on an external wall, under a window. This counteracts cold downdraughts and creates a curtain of warm air that circulates the room. Ensure there is enough space for furniture and that the radiator valve heads will be accessible for adjustment.
The Step-by-Step Installation Guide
With your tools assembled and location confirmed, it’s time to get started. Follow these steps carefully for a professional-looking result.
Step 1: Drain Your Central Heating System
This is the most critical safety step. You must fully drain the system to avoid a significant flood.
- Turn Off Your Boiler: Switch off the boiler at the mains and let the system cool down completely.
- Isolate the Radiator: Turn off both radiator valves (the lockshield and the thermostatic valve) by turning them clockwise.
- Drain the System: Attach a hosepipe to the drain-off valve, usually found on the lowest point of the system (often near the boiler or on a ground-floor radiator). Run the other end to an outside drain or a large bucket. Open the valve and allow all the water to drain out.
- Release Pressure: Once drained, use your radiator key to open the bleed valve on the old radiator. This will let air in and allow any remaining water to drain.
Step 2: Remove the Old Radiator
- Disconnect the Valves: Using an adjustable spanner, carefully unscrew the nuts that connect the radiator to the two valves. Have a bucket and towel ready for any residual water.
- Lift it Off: With the help of a friend (radiators are heavy!), lift the old radiator off its wall brackets. Carefully tilt it to empty any remaining water into the bucket.
Step 3: Fit the New Brackets and Valves
- Position the Brackets: Hold the new brackets against the wall, using the new radiator as a guide. Use a spirit level to ensure they are perfectly aligned. Mark the screw holes, drill, insert wall plugs, and securely screw the brackets in place.
- Prepare the New Valves: Wrap PTFE tape clockwise around the threads of the new radiator tails and valves to ensure a watertight seal. Screw the valves into the radiator inlet/outlet ports.
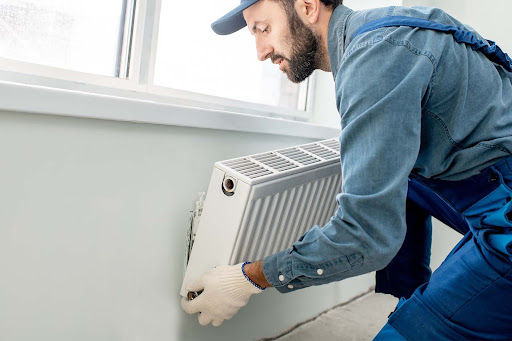
Step 4: Hang the New Radiator
With your friend’s help, carefully lift the new radiator and secure it to the brackets. Give it a gentle shake to ensure it’s stable. This is the core of the process for anyone learning how to install a radiator, and getting it securely on the wall is a significant milestone.
Step 5: Connect the Pipework
Now, connect the new radiator valves to the existing pipework. You may need to adjust the pipe lengths using your pipe cutter. Dry-fit everything first to ensure a good alignment before making final, tight connections with your wrenches. Avoid over-tightening, as this can damage the fittings.
Filling, Bleeding, and Balancing
The physical installation is complete, but the job isn’t finished. The final steps are crucial to achieving optimal performance.
Step 6: Refill the System
- Close the drain-off valve and remove the hosepipe.
- Ensure all radiator bleed valves are closed.
- Slowly refill the central heating system by opening the filling loop on your boiler or the main water inlet valve. Refer to your boiler’s manual for the correct procedure.
- Once the system pressure is in the green zone (typically 1-1.5 bar), close the filling loop.
Step 7: Bleed the Radiator
Turn on your heating and let the new radiator get warm. You will likely hear gurgling sounds; this is trapped air. Place your radiator key on the bleed valve, hold a cloth underneath, and slowly turn it anti-clockwise. You’ll hear a hiss of air. As soon as a steady stream of water appears, close the valve tightly. You may need to top up the system pressure slightly after completing this step.
Step 8: Balance the System (The Pro Tip)
If your new radiator isn’t heating up as hot as others, the system may need to be balanced. This involves adjusting the lockshield valves on each radiator to ensure heat is distributed evenly. It’s a fine-tuning process that maximises efficiency and comfort.
Key Takeaways
Learning how to install a radiator is a fantastic skill that can save you money and give you immense pride in your home. By following this guide, emphasising safety during the drain-down, precision during the mounting, and diligence during the bleeding process, you can achieve a professional and efficient installation that will keep you warm for many winters to come. Remember, if you are ever in doubt, especially when dealing with a complex system or a combi boiler, there is no shame in calling a qualified heating engineer. But for the confident DIYer, this project is a perfectly manageable way to enhance your living space.